
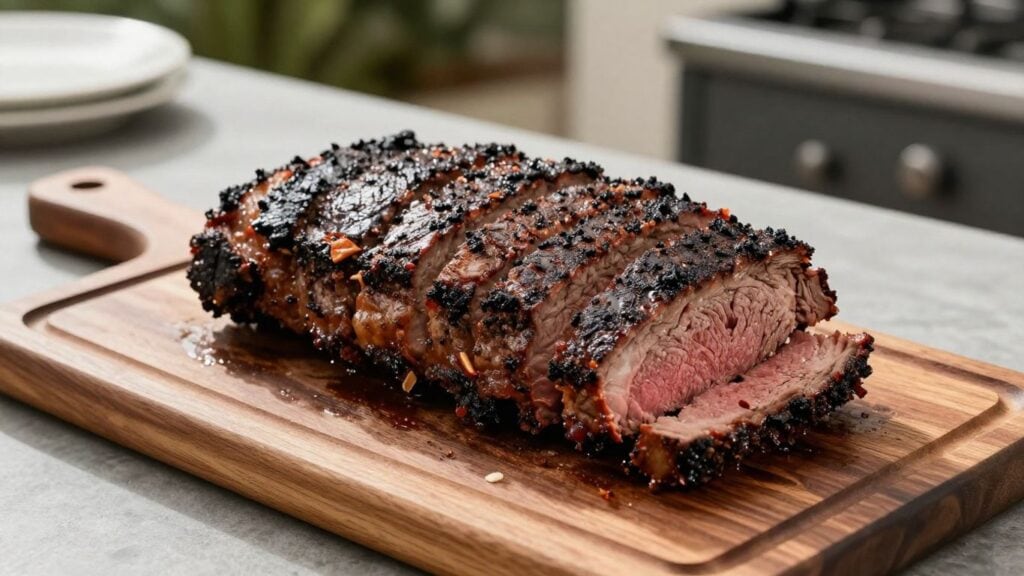
Selecting and prepping your brisket
Choosing between packer cuts and flats
Choosing the right cut is the foundation of smoking meats. Many beginners opt for the flat because it is easier to manage, but the full packer cut offers a better balance of fat and muscle that yields professional results. Selecting a high-quality brisket often feels like a guessing game until you understand the anatomy of the meat, which is why 12 best meats to smoke often cite the packer cut as the gold standard for long, slow cooks.
Identifying the ideal fat cap thickness
The fat cap acts as a natural insulator, protecting the meat from intense heat. Aim for a thickness of about a quarter-inch across the surface to ensure it renders completely without leaving a greasy, chewy layer. You want that fat to melt slowly, basting the beef as it cooks, which provides the moisture necessary for a succulent final bite.
Trimming techniques for better rendering
Aggressive trimming might look tidy, but it can dry out your brisket during long sessions. Focus on removing thick, hard pockets of silver skin or excess external fat that won’t melt down, as this creates a cleaner texture. A well-trimmed brisket allows the smoke to penetrate more deeply, ensuring the bark forms uniformly across the entire surface of the meat.
Tempering the meat before the cook
Never pull cold meat directly from the refrigerator and place it into a hot smoker. Allowing the meat to temper on the counter for about an hour brings the temperature closer to ambient levels, which helps the brisket cook more evenly and helps avoid 7 common pitfalls that often ruin backyard efforts. Tempering reduces the shock to the muscle fibers, resulting in a more tender product.
Setting up your smoker for success
Differences between offset, pellet, and charcoal smokers
Choosing your smoker is a significant investment in your culinary future. At Sun West Outdoor Kitchens, we emphasize that your equipment should match your desired level of involvement, whether you prefer the manual control of an offset or the automated convenience of modern pellets. Our experience with high-end installations shows that having the right outdoor kitchen equipment makes managing these complex processes significantly more enjoyable.
Selecting high-quality hardwoods for smoking meats
Wood selection determines the complexity of the flavor profile, ranging from mild fruit woods to robust post oak. Selecting the right wood is an essential step in understanding the historical art of smoked meat, where different species provide distinct aromatic characteristics. Using seasoned hardwood is vital, as moisture in the logs results in bitter, astringent smoke that can ruin a long cook.
Establishing consistent airflow and temperature zones
Managing internal heat is about more than just a number on a dial. You must create consistent temperature zones by managing your vents, which dictates the quality of the airflow across your brisket. Our design team at Sun West Outdoor Kitchens, with over 28 years of specialized experience, often discusses how proper ventilation and layout directly impact temperature regulation in diverse Nevada environments.
Calibrating your thermometers for accuracy
Accuracy is the difference between a dry piece of leather and a melt-in-your-mouth experience. Most factory-installed gauges are notoriously unreliable, which is why we recommend checking your equipment against a trusted digital probe. Reliable data is the backbone of consistent results, preventing you from guessing during critical stages of the Master the art of meat smoking process.
The art of the dry rub
Balancing salt, pepper, and aromatics
A great dry rub is all about layers of flavor. While salt and coarse black pepper form the classic base, adding small amounts of garlic, paprika, or even a touch of brown sugar can elevate your brisket. It is helpful to experiment with ratios until you find a balance that highlights the natural beefiness of the meat rather than overpowering it.
Application techniques for consistent bark
Applying your rub manually ensures the entire surface is covered without creating thick, clumpy spots. A light dusting followed by gentle pressure helps the seasoning adhere properly to the moisture on the meat. This ensures that every bite features a uniform, flavorful crust that holds up well through the many hours of smoking.
Timing your rub application relative to the cook
Some pitmasters apply rubs hours before the cook, while others prefer right before the meat hits the grate. Applying the rub about 30 to 60 minutes before starting allows the salt to draw a bit of moisture out and then draw it back in as part of a gentle osmosis. This process helps the spices adhere better and builds a robust flavorful foundation for the bark to form.
Avoiding common spice burn pitfalls
Sugar and certain delicate herbs can turn bitter if they encounter heat that is too high, especially over long durations. Keep high-sugar ingredients minimal or reserve them for the final few hours of the cook if you must use them. Sticking to stable, coarse ingredients generally provides a safer path toward a beautiful, dark mahogany crust that stays delicious.
Managing heat and smoke during the cook
Maintaining a steady fire temperature
Steady heat is essential for consistency throughout the entire process. Fluctuations in temperature can cause uneven cooking, leading to sections of the meat becoming overdone while others remain tough. Keeping a clean, consistent fire requires patience and frequent, small adjustments rather than dramatic, reactive changes to your fuel source.
Identifying thin blue smoke versus thick white smoke
Thin, wispy blue smoke is the hallmark of efficient, clean combustion. Conversely, thick white smoke usually indicates incomplete burning, which can deposit soot and bitter compounds on your beef. Learning to recognize these visual cues early is vital for developing a pleasant aroma and taste in your finished product.
Navigating the dreaded stall phase
When the internal temperature plateaus, the brisket is undergoing evaporation that cools the meat surface. This phase tests your patience but is necessary for the breakdown of collagen into gelatin. You might consider specific outdoor kitchen ideas to improve your workflow during this long wait, as having a comfortable space keeps you close to your fire management tools.
Effective spritzing strategies for moisture retention
Spritzing can help manage the bark development and add a little extra moisture to the environment. Using apple cider vinegar or water, lightly mist the brisket when the bark begins to look dry. You should aim for a strategic approach rather than overdoing it:
- Use a fine-mist spray bottle to avoid washing away your rub.
- Spray every 45 to 60 minutes after the first 3 hours.
- Focus on edges where the meat feels slightly dehydrated.
- Stop spritzing once you arrive at the final wrapping phase.
Using these steps keeps the surface resilient while allowing the flavors to deepen significantly before you pull the brisket off the heat.
Deciding when to wrap your brisket
Understanding the benefits of butcher paper
Butcher paper is a popular choice because it is breathable enough to preserve some bark texture while still locking in enough moisture to speed up the cook. It is a fantastic middle-ground compared to traditional methods, allowing the brisket to braise in its own juices without becoming soggy like it might in an airtight container.
Weighing the trade-offs of using aluminum foil
Aluminum foil creates a very fast, moist environment for your meat. While this definitely decreases the total cooking time, it often comes at the cost of sacrificing the crispness of your bark. Using foil is a tactical decision, best reserved for when you are on a tight schedule and need to ensure the meat reaches temperature efficiently.
Recognizing the visual cues that it is time to wrap
Your eyes are just as important as your thermometer during this process. Look for a deep, dark color that resists rubbing off on your finger, which indicates the bark is set. Once the bark feels firm and the color is a dark mahogany, you have reach the prime moment to wrap the brisket.
Ensuring the bark remains intact during the wrap
Wrap the meat tightly to keep the juices concentrated near the surface. A loose wrap allows air pockets to form, which can steam the bark and turn it mushy rather than crisp. Patience during the wrapping process guarantees that the exterior you worked so hard to build remains protected until the final slice.
Finishing the brisket to professional standards
Determining doneness through internal temperature and probe feel
Internal temperature provides a useful baseline, but probe feel is the true test of done. If the probe slides into the thickest part of the brisket with the resistance of warm butter, it is ready to come off the smoker. This tactile confirmation is far more accurate than any digital reading alone can provide for a large, complex cut.
The importance of an extended rest period
Resting is the final step that determines the success of the overall cook. Letting the brisket sit in a cooler or a warm oven for at least two hours allows the muscle fibers to relax and the juices to redistribute evenly. Rushing this stage will result in a dry, disappointing brisket even if your cook was technically perfect.
Mastering the slice against the grain
For the best texture, always slice perpendicular to the muscle fibers. This keeps the bite tender rather than chewy by shortening the fibers you consume. A sharp knife is crucial here, as it allows you to maintain clean, consistent slices that make custom outdoor kitchens look even more impressive when serving guests.
| Stage | Duration | Primary Goal |
|---|---|---|
| Smoking | 8-12 Hours | Smoke infusion and bark development |
| Wrapping | 2-4 Hours | Moisture retention and softening |
| Resting | 2-4 Hours | Juice redistribution and tenderness |
Following this schedule ensures that your brisket reaches its peak flavor and texture profile before it ever hits the dinner table.
Best practices for storing leftovers for optimal texture
Store leftover brisket by vacuum sealing it or wrapping it tightly to minimize airflow. Reheating it slowly, perhaps in a bit of reserved beef tallow or broth, restores the original juiciness that can be lost in the refrigerator. Proper storage allows you to enjoy the results of your hard work for days after your initial backyard cookout.
Conclusion
Smoking your first brisket is an rewarding investment of time that bridges the gap between basic grilling and true pitmaster artistry. With careful heat management, quality wood, and a focus on resting the meat, you can create a centerpiece that elevates any backyard gathering to a luxury experience.
Frequently Asked Questions
How often should I check the internal temperature?
Check the temperature every hour or two once you reach the midpoint of the cook to track progress without losing excessive heat from opening the lid frequently.
Should I cook the brisket fat-side up or down?
Cooking fat-side down is often preferred by those using offset smokers, as it provides a sacrificial barrier between the meat and the heat source, though both methods work if you monitor heat.
Can I smoke a brisket without an expensive smoker?
Yes, even a basic charcoal setup can produce excellent results if you are diligent about managing your airflow and keeping the temperature steady throughout the long duration.
What do I do if the brisket dries out?
If the meat seems dry during the cook, ensure you are wrapped properly to retain juices; if the finished product is dry, try slicing it thinner or serving it with a warm au jus.
Is wood flavor too strong for beginners?
Wood flavor intensity depends on the species used, so beginners might start with lighter woods like pecan or apple to avoid an overpowering or bitter profile.
Does the brisket continue cooking after it is removed from the smoker?
Yes, the internal temperature will typically rise for a short period after you remove it from the heat, which is why monitoring the rest stage is absolutely critical.
Why does the brisket smell like ash?
An ashy flavor usually indicates poor combustion and lack of oxygen, suggesting that you need to adjust your intake and exhaust vents to get a cleaner, thinner blue smoke.
[…] in the Southwest, ensuring your grill can handle high temperatures is essential to maintain a perfectly cooked brisket during long, slow smoking […]
[…] height, protected, and honestly — it looks like furniture. If you’re into smoking, our guide to smoking meats covers what an Egg can […]
[…] Adding an infrared rotisserie burner provides an entirely different dimension to your cooking setup. By moving the heat source, you gain the ability to perform vertical roasting, which delivers even, slow-cooked results that are impossible to simulate with standard convection. This feature is a game-changer for those attempting a large brisket smoke session. […]
[…] build the custom BBQ island or outdoor kitchen around how you cook — then christen it with a brisket. Contact us for a free design consultation. Serving Las Vegas, Henderson, and Summerlin since […]